Enable web services for USI validation
The Auskeys are encrypted bits of information stored on your computer then validated across the internet with the government services you use.
To request access for web services (that allow CourseSales.com to validate USIs on your behalf) visit this page:
https://forms.business.gov.au/smartforms/servlet/SmartForm.html?formCode=USI-SysAccess
More information is available here:
https://www.usi.gov.au/faqs/i-want-know-how-use-web-services-connect-usi-registry-system https://www.usi.gov.au/training-organisations/set-access-usi-registry-system
Enable USI Validation
From April 2020 it will be necessary to use the myGovID authentication rather than auskey. To set up the MyGovID please follow these steps:
Step 1 Prior activities
The USI Verification system in CourseSales.com is managed automatically though a notification in the cloud. Before you begin to configure USI validation, you will need to:
- Register with training.gov.au
- Hold an ABN
- Claim your ABN in (Relationship Authorisation Manager) RAM
- Be the Principal Authority or Authorised Administrator of your RTO in RAM
For information on how to get a digital identity, link your business and authorise others to act on behalf of the business, please refer to https://info.authorisationmanager.gov.au/
Step 2 Add a ‘notification’ for CourseSales.com - your Digital Service Provider
Log in to RAM (Relationship Authorisation Manager) and follow the instructions to authorise a new cloud software notification. You will also be issued with an SSID - please contact us if you don’t have this.
Digital Service Provider Details:
- CourseSales.com ABN: 24 140 350 107
- Company Name: Course Sales Pty Ltd
Step 3 Notify CourseSales.com
Once this is set up notify CourseSales.com support and we will complete the configuration
The USI is required for each student attending an accredited training course. Australian Registered Training Organisations (RTOs) are obligated to collect a student’s USI before issuing certificates. It is recommended that students register for their own USI, so the significant effort for a training company is validating and then chasing up students.
Advanced: How to set up USI validation
Usually this is completed for you as part of the onboarding process. To check see if there is already an export map available for USI validation.
Step 1
Set up forms and fields for USI management.
Step 2
Create a Export Map with the following settings (the order of the fields is important). This uses the Export Queue:
-
Name: AVETMISS USI Validation
-
Type: AVETMISS USI Validation
-
Status: Active
-
Field 1 Record Type: Documents Data: AVETMISS 7.0 Client First Given Name Transform: none Export Name: FName
-
Field 2 Record Type: Documents Data: AVETMISS 7.0 Client Last Name Transform: none Export Name: SName
-
Field 3 Record Type: Documents Data: AVETMISS 7.0 Date of Birth Transform: none Export Name: BDate
-
Field 4 Record Type: Documents Data: AVETMISS 7.0 Unique Student Identifier Transform: none Export Name: USI
-
Field 5 Record Type: Documents Data: Document External Id Transform: none Export Name: ExternalId
Step 3
Add the export map ‘AVETMISS USI Validation’ to both the process rule that receives the USI information (usually ‘Registration’ or ‘Full Registration’) and the USI Reminder Response (used when the student corrects their details).
Step 4
To test this you should see that when a USI is submitted by a customer that the USI details appear in the Export Queue. If the USI does not validate a student should then follow the link in the email, their submission of the corrected information, ie non-validated USI data, should also then appear in the Export Queue.
Step 5
Notify CourseSales.com via the online chat with the ProcessID for the USI Reminder and USI Validated process steps. We will set this up to then process automatically.
How to setup USI validation for single names
CourseSales.com can be configured to verify students with one name. Below explains how to cater for one name.
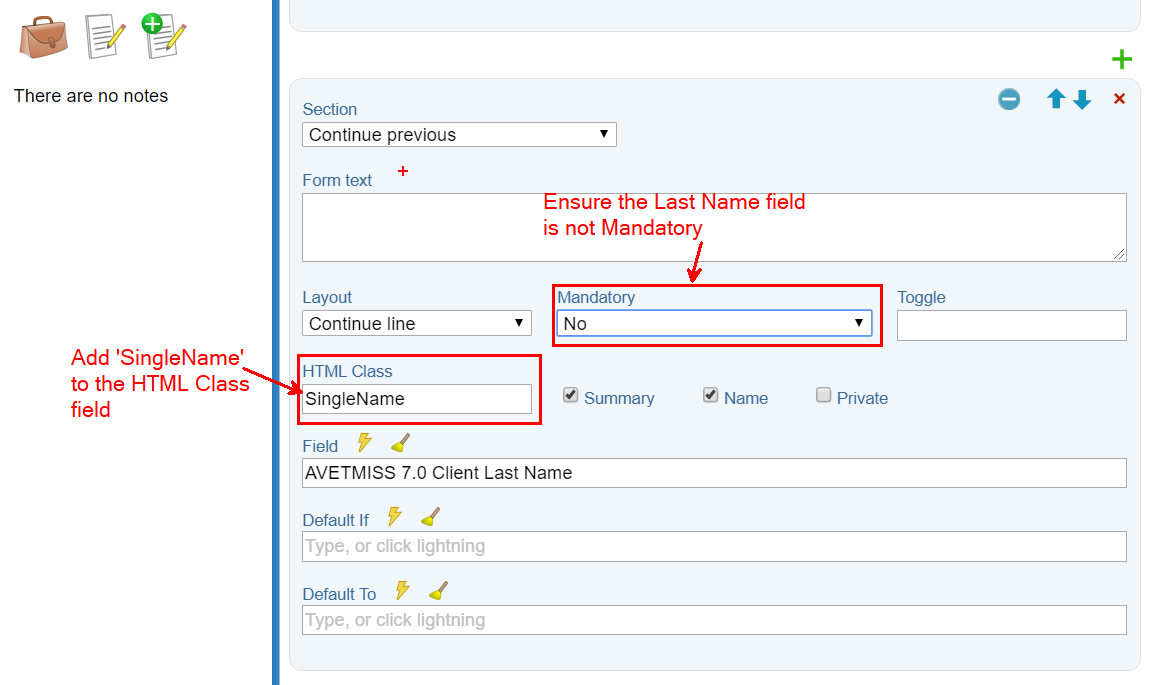
Step 1
Edit the forms and make the second name (surname) optional, not mandatory, add ‘SingleName’ to the HTML Class field. Ensure you save and publish ALL forms with these changes. The contact form for the student does not require the HTML Class field ‘SingleName’ but does need to be not mandatory and published.
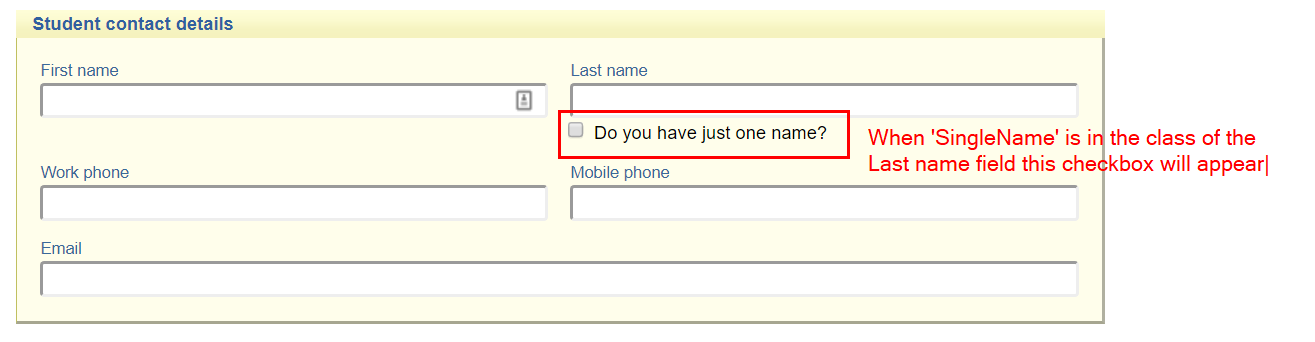
Step 2
You will notice the following:
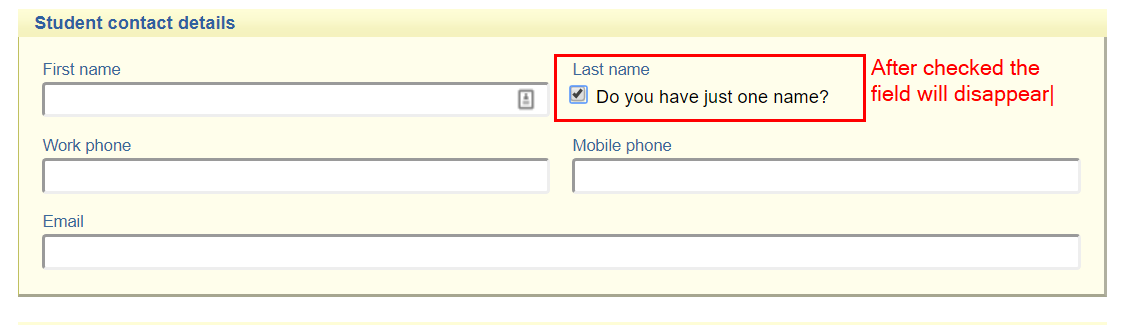
Step 3
And once ‘Do you have just one name?’ is checked:
Step 4
Testing required:
- Complete an enrolment as a student via the public pages
- Respond to an invalid USI
- Update the form in the administration portal
- Confirm trainers in the trainer portal can complete an enrolment.
- Send a certificate (view the PDF certificate, confirm it appears OK)
- Check that AVETMISS exports (specifically NAT0085 & NAT0080) export that student’s name as expected (the first name should be copied into the surname field)
If you don’t see this appearing on your Wordpress site then please add the following code on a javascript page within the $(document).ready(function() { …code here… }); routine.
//Single Names
$( "div.SingleName" ).after('<input type="checkbox" id="SingleNameCheckbox"> Do you have just one name?');
    $('#SingleNameCheckbox').change(function(){
      if(this.checked)
            $('input.SingleName').fadeOut('slow');
        else
            $('input.SingleName').fadeIn('slow');
    });

});